Minting
This is the first of many tutorials in a series where you'll be creating a complete NFT smart contract from scratch that conforms with all the NEAR NFT standards.
Today you'll learn how to create the logic needed to mint NFTs and have them show up in your NEAR wallet. You will be filling a bare-bones skeleton smart contract to add minting functionalities.
You can find the skeleton contract in our Skeleton folder
A completed version of this tutorial can be found in the Basic NFT folder
Introduction
To get started, go to the nft-contract-skeleton folder in our repo. If you haven't cloned the repository, refer to the Contract Architecture to get started.
cd nft-contract-skeleton/
If you wish to see the finished code of this step-by-step basic NFT contract tutorial, that can be found on the nft-contract-basic folder.
Modifications to the skeleton contract
In order to implement the logic needed for minting, we should break it up into smaller tasks and handle those one-by-one. Let's step back and think about the best way to do this by asking ourselves a simple question: what does it mean to mint an NFT?
To mint a non-fungible token, in the most simple way possible, a contract needs to be able to associate a token with an owner on the blockchain. This means you'll need:
- A way to keep track of tokens and other information on the contract.
- A way to store information for each token such as
metadata(more on that later). - A way to link a token with an owner.
That's it! We've now broken down the larger problem into some smaller, less daunting, subtasks. Let's start by tackling the first and work our way through the rest.
Storing information on the contract
Start by navigating to nft-contract-skeleton/src/lib.rs and filling in some of the code blocks.
You need to be able to store important information on the contract such as the list of tokens that an account has.
Contract Struct
The first thing to do is modifying the contract struct as follows:
Loading...
This allows you to get the information stored in these data structures from anywhere in the contract. The code above has created 3 token specific storages:
- tokens_per_owner: allows you to keep track of the tokens owned by any account
- tokens_by_id: returns all the information about a specific token
- token_metadata_by_id: returns just the metadata for a specific token
In addition, you'll keep track of the owner of the contract as well as the metadata for the contract.
You might be confused as to some of the types that are being used. In order to make the code more readable, we've introduced custom data types which we'll briefly outline below:
- AccountId: a string that ensures there are no special or unsupported characters.
- TokenId: simply a string.
As for the Token, TokenMetadata, and NFTContractMetadata data types, those are structs that we'll define later in this tutorial.
Initialization Functions
Next, create what's called an initialization function; we will name it new, but you can choose any name you prefer.
This function needs to be invoked when you first deploy the contract. It will initialize all the contract's fields that you've defined above with default values.
Don't forget to add the owner_id and metadata fields as parameters to the function, so only those can be customized.
This function will default all the collections to be empty and set the owner and metadata equal to what you pass in.
Loading...
More often than not when doing development, you'll need to deploy contracts several times. You can imagine that it might get tedious to have to pass in metadata every single time you want to initialize the contract. For this reason, let's create a function that can initialize the contract with a set of default metadata. You can call it new_default_meta and it'll only take the owner_id as a parameter.
Loading...
This function is simply calling the previous new function and passing in the owner that you specify and also passes in some default metadata.
Metadata and token information
Now that you've defined what information to store on the contract itself and you've defined some ways to initialize the contract, you need to define what information should go in the Token, TokenMetadata, and NFTContractMetadata data types.
Let's switch over to the nft-contract-skeleton/src/metadata.rs file as this is where that information will go.
If you look at the standards for metadata, you'll find all the necessary information that you need to store for both TokenMetadata and NFTContractMetadata. Simply fill in the following code.
Loading...
This now leaves you with the Token struct and something called a JsonToken. The Token struct will hold all the information directly related to the token excluding the metadata. The metadata, if you remember, is stored in a map on the contract in a data structure called token_metadata_by_id. This allows you to quickly get the metadata for any token by simply passing in the token's ID.
For the Token struct, you'll just keep track of the owner for now.
Loading...
Since NEAR smart contracts receive and return data in JSON format, the purpose of the JsonToken is to act as output when the user asks information for an NFT. This means you'll want to store the owner, token ID, and metadata.
Loading...
Some of you might be thinking "how come we don't just store all the information in the Token struct?".
The reason behind this is that it's actually more efficient to construct the JSON token on the fly only when you need it rather than storing all the information in the token struct.
In addition, some operations might only need the metadata for a token and so having the metadata in a separate data structure is more optimal.
Function for querying contract metadata
Now that you've defined some of the types that were used in the previous section, let's move on and create the first view function nft_metadata. This will allow users to query for the contract's metadata as per the metadata standard.
Loading...
This function will get the metadata object from the contract which is of type NFTContractMetadata and will return it.
Just like that, you've completed the first two tasks and are ready to move onto last part of the tutorial.
Minting Logic
Now that all the information and types are defined, let's start brainstorming how the minting logic will play out. In the end, you need to link a Token and TokenId to a specific owner. Let's look back at the lib.rs file to see how you can accomplish this. There are a couple data structures that might be useful:
//keeps track of all the token IDs for a given account
pub tokens_per_owner: LookupMap<AccountId, UnorderedSet<TokenId>>,

//keeps track of the token struct for a given token ID
pub tokens_by_id: LookupMap<TokenId, Token>,

//keeps track of the token metadata for a given token ID
pub token_metadata_by_id: UnorderedMap<TokenId, TokenMetadata>,
Looking at these data structures, you could do the following:
- Add the token ID into the set of tokens that the receiver owns. This will be done on the
tokens_per_ownerfield. - Create a token object and map the token ID to that token object in the
tokens_by_idfield. - Map the token ID to it's metadata using the
token_metadata_by_id.
Storage Implications
With those steps outlined, it's important to take into consideration the storage costs of minting NFTs. Since you're adding bytes to the contract by creating entries in the data structures, the contract needs to cover the storage costs. If you just made it so any user could go and mint an NFT for free, that system could easily be abused and users could essentially "drain" the contract of all it's funds by minting thousands of NFTs. For this reason, you'll make it so that users need to attach a deposit to the call to cover the cost of storage. You'll measure the initial storage usage before anything was added and you'll measure the final storage usage after all the logic is finished. Then you'll make sure that the user has attached enough $NEAR to cover that cost and refund them if they've attached too much.
This is how we do it in code:
Loading...
You'll notice that we're using some internal methods such as refund_deposit and internal_add_token_to_owner. We've described the function of refund_deposit and as for internal_add_token_to_owner, this will add a token to the set of tokens an account owns for the contract's tokens_per_owner data structure. You can create these functions in a file called internal.rs. Go ahead and create the file. Your new contract architecture should look as follows:
nft-contract
├── Cargo.lock
├── Cargo.toml
├── README.md
├── build.sh
└── src
    ├── approval.rs
    ├── enumeration.rs
    ├── internal.rs
    ├── lib.rs
    ├── metadata.rs
    ├── mint.rs
    ├── nft_core.rs
    ├── events.rs
    └── royalty.rs
Add the following to your newly created internal.rs file.
Loading...
You may notice more functions in the internal.rs file than we need for now. You may ignore them, we'll come back to them later.
Let's now quickly move to the lib.rs file and make the functions we just created invokable in other files. We'll add the internal crates and mod the file as shown below:
Loading...
At this point, the core logic is all in place so that you can mint NFTs. You can use the function nft_mint which takes the following parameters:
- token_id: the ID of the token you're minting (as a string).
- metadata: the metadata for the token that you're minting (of type
TokenMetadatawhich is found in themetadata.rsfile). - receiver_id: specifies who the owner of the token will be.
Behind the scenes, the function will:
- Calculate the initial storage before adding anything to the contract
- Create a
Tokenobject with the owner ID - Link the token ID to the newly created token object by inserting them into the
tokens_by_idfield. - Link the token ID to the passed in metadata by inserting them into the
token_metadata_by_idfield. - Add the token ID to the list of tokens that the owner owns by calling the
internal_add_token_to_ownerfunction. - Calculate the final and net storage to make sure that the user has attached enough NEAR to the call in order to cover those costs.
Querying for token information
If you were to go ahead and deploy this contract, initialize it, and mint an NFT, you would have no way of knowing or querying for the information about the token you just minted. Let's quickly add a way to query for the information of a specific NFT. You'll move to the nft-contract-skeleton/src/nft_core.rs file and edit the nft_token function.
It will take a token ID as a parameter and return the information for that token. The JsonToken contains the token ID, the owner ID, and the token's metadata.
Loading...
With that finished, it's finally time to build and deploy the contract so you can mint your first NFT.
Interacting with the contract on-chain
Now that the logic for minting is complete and you've added a way to query for information about specific tokens, it's time to build and deploy your contract to the blockchain.
Deploying the contract
For deployment, you will need a NEAR account with the keys stored on your local machine. Navigate to the NEAR wallet site and create an account.
Please ensure that you deploy the contract to an account with no pre-existing contracts. It's easiest to simply create a new account or create a sub-account for this tutorial.
Log in to your newly created account with near-cli-rs by running the following command in your terminal.
near account import-account using-web-wallet network-config testnet
To make this tutorial easier to copy/paste, we're going to set an environment variable for your account ID. In the command below, replace YOUR_ACCOUNT_NAME with the account name you just logged in with including the .testnet portion:
export NFT_CONTRACT_ID="YOUR_ACCOUNT_NAME"
Test that the environment variable is set correctly by running:
echo $NFT_CONTRACT_ID
Verify that the correct account ID is printed in the terminal. If everything looks correct you can now deploy your contract. In the root of your NFT project run the following command to deploy your smart contract and answer questions:
cargo near deploy $NFT_CONTRACT_ID

> Select the need for initialization: with-init-call     - Add an initialize
> What is the name of the function? new_default_meta
> How would you like to pass the function arguments? json-args
> Enter the arguments to this function: {"owner_id": "<YOUR_NFT_CONTRACT_ID>"}
> Enter gas for function call: 100 TeraGas
> Enter deposit for a function call (example: 10NEAR or 0.5near or 10000yoctonear): 0 NEAR
> What is the name of the network? testnet
> Select a tool for signing the transaction: sign-with-keychain
> How would you like to proceed? send
You don't need to answer these questions every time. If you look at the results you will find the message Here is the console command if you ever need to re-run it again. The next line is the command which you may use instead of answering to interactive questions:
cargo near deploy $NFT_CONTRACT_ID with-init-call new_default_meta json-args '{"owner_id": "'$NFT_CONTRACT_ID'"}' prepaid-gas '100.0 Tgas' attached-deposit '0 NEAR' network-config testnet sign-with-keychain send
You've just deployed and initialized the contract with some default metadata and set your account ID as the owner. At this point, you're ready to call your first view function.
Viewing the contract's metadata
Now that the contract has been initialized, you can call some of the functions you wrote earlier. More specifically, let's test out the function that returns the contract's metadata:
near contract call-function as-read-only $NFT_CONTRACT_ID nft_metadata json-args {} network-config testnet now
This should return an output similar to the following:
{
  spec: 'nft-1.0.0',
  name: 'NFT Tutorial Contract',
  symbol: 'GOTEAM',
  icon: null,
  base_uri: null,
  reference: null,
  reference_hash: null
}
At this point, you're ready to move on and mint your first NFT.
Minting our first NFT
Let's now call the minting function that you've created. This requires a token_id and metadata. If you look back at the TokenMetadata struct you created earlier, there are many fields that could potentially be stored on-chain:
Loading...
Let's mint an NFT with a title, description, and media to start. The media field can be any URL pointing to a media file. We've got an excellent GIF to mint but if you'd like to mint a custom NFT, simply replace our media link with one of your choosing. If you run the following command, it will mint an NFT with the following parameters:
- token_id: "token-1"
- metadata:
- title: "My Non Fungible Team Token"
- description: "The Team Most Certainly Goes :)"
- media:
https://bafybeiftczwrtyr3k7a2k4vutd3amkwsmaqyhrdzlhvpt33dyjivufqusq.ipfs.dweb.link/goteam-gif.gif - receiver_id: "'$NFT_CONTRACT_ID'"
near contract call-function as-transaction $NFT_CONTRACT_ID nft_mint json-args '{"token_id": "token-1", "metadata": {"title": "My Non Fungible Team Token", "description": "The Team Most Certainly Goes :)", "media": "https://bafybeiftczwrtyr3k7a2k4vutd3amkwsmaqyhrdzlhvpt33dyjivufqusq.ipfs.dweb.link/goteam-gif.gif"}, "receiver_id": "'$NFT_CONTRACT_ID'"}' prepaid-gas '100.0 Tgas' attached-deposit '0.1 NEAR' sign-as $NFT_CONTRACT_ID network-config testnet sign-with-legacy-keychain send
The amount flag is specifying how much NEAR to attach to the call. Since you need to pay for storage, 0.1 NEAR is attached and you'll get refunded any excess that is unused at the end.
Viewing information about the NFT
Now that the NFT has been minted, you can check and see if everything went correctly by calling the nft_token function.
This should return a JsonToken which should contain the token_id, owner_id, and metadata.
near contract call-function as-read-only $NFT_CONTRACT_ID nft_token json-args '{"token_id": "token-1"}' network-config testnet now
Example response:
{
  token_id: 'token-1',
  owner_id: 'goteam.examples.testnet',
  metadata: {
    title: 'My Non Fungible Team Token',
    description: 'The Team Most Certainly Goes :)',
    media: 'https://bafybeiftczwrtyr3k7a2k4vutd3amkwsmaqyhrdzlhvpt33dyjivufqusq.ipfs.dweb.link/goteam-gif.gif',
    media_hash: null,
    copies: null,
    issued_at: null,
    expires_at: null,
    starts_at: null,
    updated_at: null,
    extra: null,
    reference: null,
    reference_hash: null
  }
}
Go team! You've now verified that everything works correctly and it's time to view your freshly minted NFT in the NEAR wallet's collectibles tab!
Viewing your NFTs in the wallet
If you navigate to the collectibles tab in the NEAR wallet, this should list all the NFTs that you own. It should look something like the what's below.
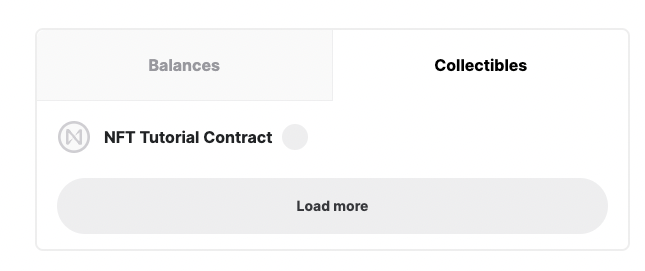
We've got a problem. The wallet correctly picked up that you minted an NFT, however, the contract doesn't implement the specific view function that is being called. Behind the scenes, the wallet is trying to call nft_tokens_for_owner to get a list of all the NFTs owned by your account on the contract. The only function you've created, however, is the nft_token function. It wouldn't be very efficient for the wallet to call nft_token for every single NFT that a user has to get information and so they try to call the nft_tokens_for_owner function.
In the next tutorial, you'll learn about how to deploy a patch fix to a pre-existing contract so that you can view the NFT in the wallet.
Conclusion
In this tutorial, you went through the basics of setting up and understand the logic behind minting NFTs on the blockchain using a skeleton contract.
You first looked at what it means to mint NFTs and how to break down the problem into more feasible chunks. You then started modifying the skeleton contract chunk by chunk starting with solving the problem of storing information / state on the contract. You then looked at what to put in the metadata and token information. Finally, you looked at the logic necessary for minting NFTs.
After the contract was written, it was time to deploy to the blockchain. You deployed the contract and initialized it. Finally, you minted your very first NFT and saw that some changes are needed before you can view it in the wallet.
Next Steps
In the next tutorial, you'll find out how to deploy a patch fix and what that means so that you can view your NFTs in the wallet.